Sugar Swings! Serve Some: halloween
Showing posts with label halloween. Show all posts

Sunday, October 2, 2022

Cute Horror Movie Pumpkin Spice'men Cookies

Scary horror movie character cookies

It's officially October so here come all the Halloween treats and ideas!

I usually do some character-inspired gingerbread cookies around the holidays but found pumpkin spice cookie mix so decided to mix it up and make some pumpkin spice'men cut out cookies since it's also pumpkin spice season.

Scary horror movie character cookies

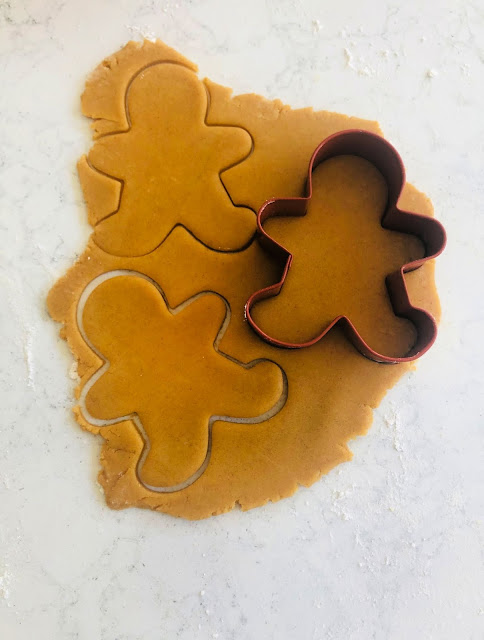
Once the cookie dough is mixed up and chilled, roll out and use a gingerbread man cookie cutter to cut out shapes.

Scary horror movie character cookies

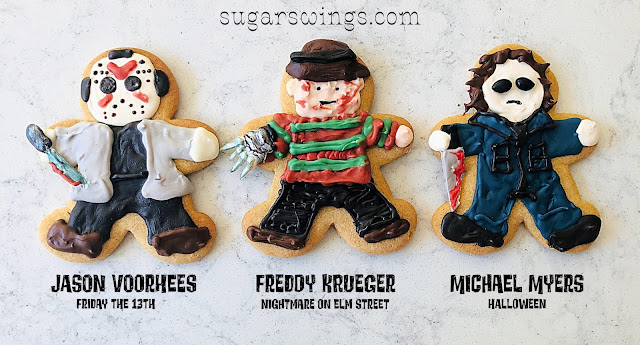
I had to make some of my favorite slasher villains from the 80s

Jason Freddy Krueger Michael Myers cookies

A couple of villainous kids!

chucky and the ring character cookies

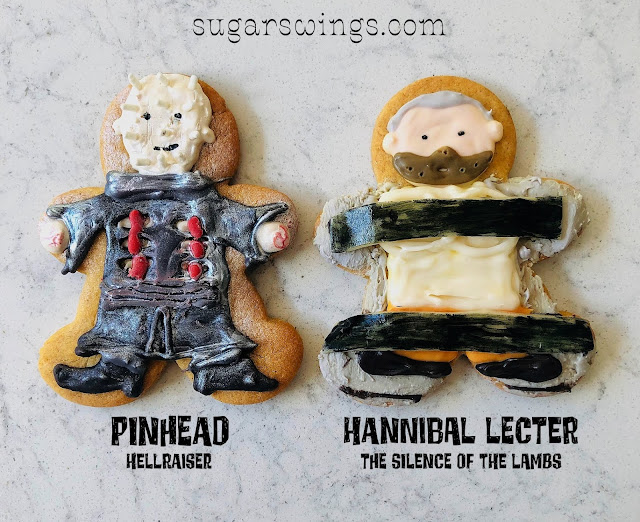
And a couple other favs that are just plain disturbing 
(white sprinkles used as Pinhead's face nails!)

Pinhead and Hannibal Lecter cookies

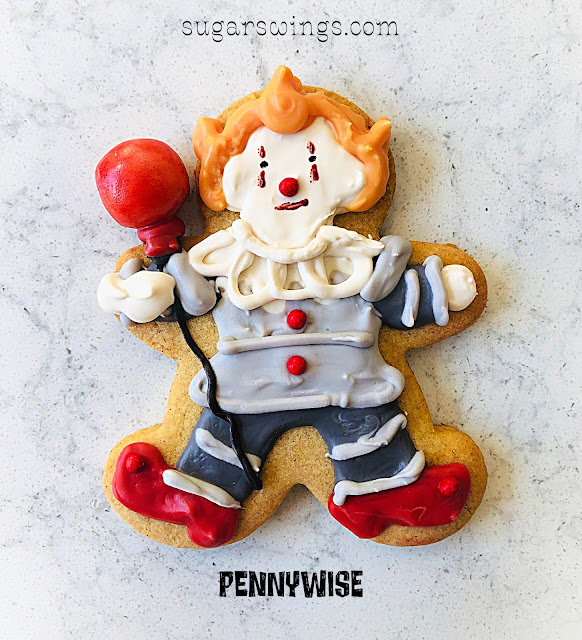
And the creepiest clown of all from It

Pennywise It Clown Cookie

In cookie form I think they are pretty cute for horror film anti-heroes! 

Scary horror movie character cookies

Who is your favorite?


To make pumpkin spice cut-out cookies:
  1. Mix all together until cookie dough comes together.
  2. Chill for about 30 minutes
  3. Roll out dough and use gingerbread man cookie cutter
  4. Decorate with various colors of melting candy wafers

Tuesday, October 5, 2021

Mummy Babka Bread for Halloween

Mummy Babka Bread for Halloween

If anyone follows my IG you know that over the COVID quarantine I got a little obsessed with making babka bread.  What's babka?? It's a delicious swirled bread that normally has a lot of chocolate and/or other fillings inside.

Here are some of the various ones I've made (and there are more!)

You can find most on my Insta account if you search #babka

Various colorful babka

Well, I had to make another one and Halloween it up.  I mean it seemed right for a mummy costume since it's already swirled and lots of bread twists already.

Mummy white chocolate babka bread


Once you have your sweet bread dough ready, roll it out into a large rectangle. I used white chocolate, coconut cream, cardamom, and a hemp seed mixture to spread all over for the filling. 

How to make mummy babka bread

You can use anything you like really - just leave a border around and roll up like a jelly roll. Cut down the middle and start wrapping the layers around each other. 

How to make mummy babka bread

Put into a loaf pan and let rise in a warm spot for about 30-40 minutes. 

How to make mummy babka bread

I used a little dough to add mummy eyes!

How to make mummy babka bread

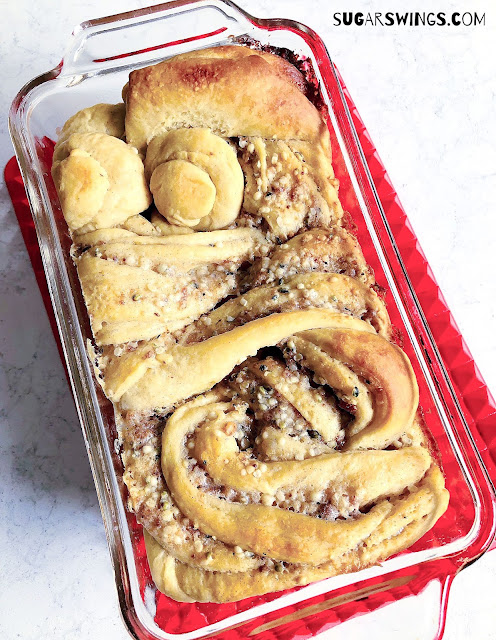
After rising it should look nice and puffy. 

How to make mummy babka bread

Bake until internal temperature reaches 190 F. Cover with foil if the top starts to get too brown. 

How to make mummy babka bread

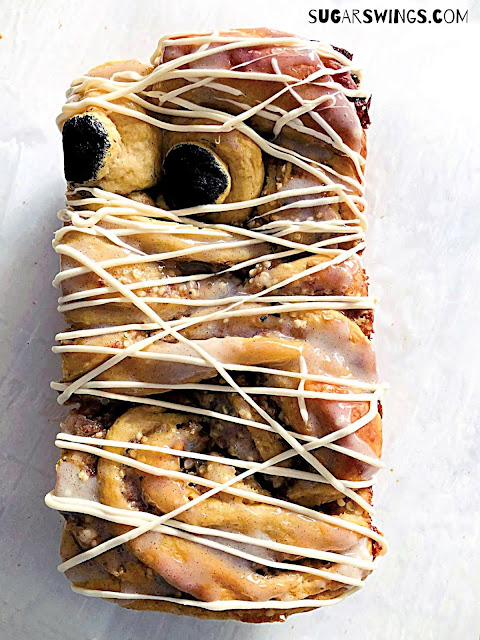
I added extra white chocolate, coconut cream, cardamom mixture on top, and also drizzled some melted white chocolate for a more mummy look. 

Mummy babka bread

Use some black food color to add detail to the eyes!  Then just cut and serve.

Halloween Mummy babka bread

Fun for any Halloween party!


Babka Dough Recipe

1 package instant yeast
1 teaspoon vanilla extract
1/4 cup vegetable or canola oil
1/8 cup honey
1 egg
2 cups all purpose flour
1/2 teaspoon salt
1/4 cup warm water

Directions:
  • Mix yeast and warm water together and let sit for 5-10 mins
  • Mix vanilla, oil, honey, egg, and salt together
  • Add flour to bowl and add yeast mixture and mix until incorporated
  • Add the other ingredients and mix until incorporated
  • Turn out onto the counter and kneed until soft and pliable
  • Cover and let proof until doubled in size
  • Roll out to to 11X14 rectangle (save small portion for mummy eyes)
  • Add filling and roll lengthwise into jelly roll
  • Cut down center and twist each length around each other
  • Add 2 eyes (1 larger circle with 1 smaller circle in center)
  • Add to loaf pan and let proof again for 30-40 minutes
  • Bake at 350 degrees until internal temperature is 190 degrees (cover with foil if the top starts to brown)
  • Once semi-cooled add any extra filling as glaze 
  • Melt vanilla chips and drizzle on top
  • See this video on how to roll out, cut, and shape babka dough

Filling

1 cup vanilla chips (melted)
2 tablespoons coconut cream
2 teaspoons cardamom
2 Tablespoons hemp seed

Directions: Mix all together into a paste; save some for a glaze on top once babka is baked.




Sunday, October 18, 2020

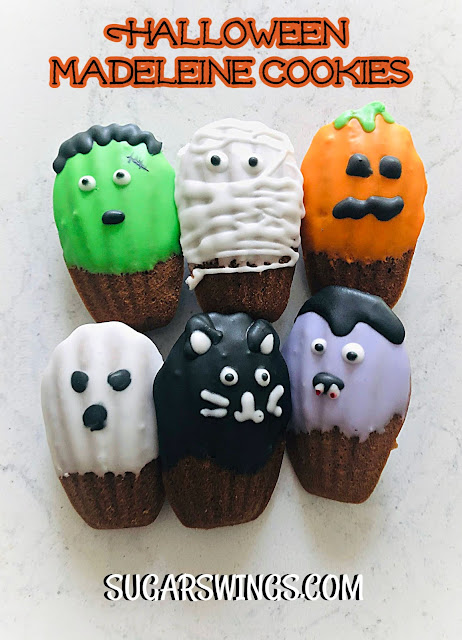
Chocolate Halloween Madeleine Cookies

 spooky halloween chocolate madeleine cookies


It's Halloween season and time for all that is spooky!  Making good use of my madeleine pan again by making some chocolate madeleines in Halloween costumes.

Ghosts, Black Cats, Jack O' Lanterns, Frankenstein's Monster, Dracula. and the Mummy

ghost pumpkin frankenstein vampire cat mummy madeleine cookies

Bake up you fav madeliene cookie recipe

chocolate madeleine cookies

And whip up some royal icing tinted black, orange, green, purple 

chocolate madeleine cookies

Then decorate.  These are pretty simple and you don't need a ton of piping skills either.

ghost madeleine cookies

These madeleine cookies are ready to go trick or treating!

halloween madeleine cookies

Chocolate madeleine recipe can be found here

Royal icing recipe can be found here

Saturday, October 13, 2018

Day of the Dead (Día de los Muertos) No Dip Cake Bites


Have you noticed all the Day of the Dead stuff in stores lately? In all transparency I really didn't know much about this holiday except that it was of Mexican origin so I decided to do a little research.  


Day of the Dead aka Día de los Muertos is indeed a Mexican holiday that focuses on gatherings of family and friends to pray for and remember those who have died and help support their spiritual journey.   


I was curious about all the skulls decorated with bright colors and flowers and according to experts (aka Wikipedia) "people go to cemeteries to be with the souls of the departed and build private altars containing favorite foods and beverages, as well as photos and memorabilia, of the departed. The intent is to encourage visits by the souls, so the souls will hear the prayers and the comments of the living directed to them." 


 "Plans for the day are made throughout the year, including gathering the goods to be offered to the dead. During the 3-day period families usually clean and decorate graves which often include orange Mexican marigolds sometimes called Flor de Muerto (Flower of Dead). These flowers are thought to attract souls of the dead to the offerings. It is also believed the bright petals with a strong scent can guide the souls from cemeteries to their family homes."

"Families will also offer trinkets or the deceased's favorite candies on the grave. Some families have ofrendas in homes, usually with foods such as candied pumpkin, pan de muerto ("bread of dead"), and sugar skulls; and beverages such as atole. The ofrendas are left out in the homes as a welcoming gesture for the deceased."
So now I know and decided to make some of my own sugar skulls! I opted for no dip cake bites.


Dipping treats is my least favorite thing to do so I found a work  around.  I started with some cupcakes.  Crumble and mix with the frosting in a bowl.


Use a skull silicone ice cube tray and outline skull with melted white chocolate or vanilla melting wafers.  Don't fill it all the way with the chocolate - you want to leave space to fill it.  Refrigerate for 5-10 minutes until chocolate is hardened.


Fill mold with cupcake mixture then cover with more melted chocolate.


Refrigerate for another 10 minutes then pop skull out of mold.


Decorate with fun sprinkles and/or more melting wafers.  I added a little edible silver spray to finish them.


Day of the Dead falls is October 31, Nov 1, and 2.  Kinda neat that it coincides with Halloween!


Do you celebrate or decorate for Day of the Dead? If so share what you do! 

Hay más tiempo que vida which means there is more time than life - so very true.  Enjoy each day to its fullest!

Happy days to you and thanks for stopping by!

Sunday, October 29, 2017

Creepy Clown (Pennywise from It) Madeleine Cookies


Hey ALL! It's almost Halloween so what better way to celebrate then with some creepy clown cookies??!


Well more specifically, these are Pennywise the Clown from It! I've always been a Stephen King fan and I'm loving his movie/book revival.  And the new Pennywise is pretty creepy:


I made him out of madeleine cookies - although he does look a bit like a spookier version of Ronald McDonald!


I love my madeleine pan and I've used it a million times. They are the perfect blend of cookie and cake.


Bake up a batch and then decorate with melted vanilla candy melts, red candy melts (for mouth and hair), white sprinkles for teeth, red heart sprinkle for nose, and white ball sprinkles for eyes (color them with yellow food writer)


Red detail on the face is made with painting red food gel color on with the paint brush for food or you can use a red food writer.  

Add a straw to make them into cookie pops!


OR plop them into Halloween cupcake wrappers to look like Pennywise is peeking out at you.  


My one kiddo that hates clowns won't even look at these so assuming that means they are pretty creepy for this Halloween! Are you a clown lover or hater??

Happy Almost Halloween!

Tuesday, October 25, 2016

Halloween Skull Cake Bites (no dipping required!)


Less than a week to Halloween peeps! Halloween treats have been showing up across the interwebs since the beginning of September (or earlier!) so I figured I'd add some colorful skull cake bites to the mix. 

I do have to admit that although I love cake bites and cake pops, I loathe dipping them in melted candy wafers or chocolate. 


Maybe I just don't have the patience, but I really really REALLY don't like the dipping process. It's messy, you have to be quick and you need to get the melted candy just right (not too think or thin).  And since mine never come out perfect, I just decide I don't like to make them.  (I also don't like dipping or coating petit fours!)

But I found a solution!  

Use a candy mold (or in this case a dollar store ice cube tray) in whatever form or shape you like. Mix up your cake and icing like you would for regular cake bites but instead of dipping the cake mixture into melted candy - melt the candy and outline the mold.  Once it hardens add your cake mixture to the cavity, then add more melted candy to cover it.  Refrigerate (or freeze) for 10 minutes then pop out of the mold.

Voila! No dip cake bites!


I sprayed my cake bite skulls with some pearl color mist in pearl to give the cake bites a shimmery shine.  

This is my favorite stuff of all times (and I don't even get any free product from Wilton!).  


Wilton makes it in many colors and it's a quick way to color your treats - like edible spray paint.  
SO fun.


And of course the cake inside makes these little skulls so tasty.  I tinted the cake mixture red because they are little skulls and well, it's Halloween!


I have like a gagillion candy molds and ice cube trays so I'm going to have to use this technique for more cake bites.  It could be tricky making cake pops - but depending on the mold it could work too or you can add a little more melted candy to the back of the cake bite to attach a stick.   


These little guys are a Halloween gift for a special friend. How cute are they in a re-purposed little box?!  Add Halloween stickers and some spooky candies and you have a gift that's way better than any store-bought candy box.  Since the cake bites are easy to put together (and no dipping needed!) make a bunch for your friends or this year's Halloween party!


No Dip Skull Cake Bites
Ingredients
  • 5 cups of candy melts/wafers (1 cup of black, white, lime green, purple, orange)
  • 2 cups of crumbled cake
  • 1/4 to 1/2 cup of frosting
  • Red food color/gel
  • Pearl Wilton Color Mist 
  • Skull ice cube tray or mold
Instructions:
  1. Mix cake crumbles with frosting and 2-3 drops of red food gel until well mixed.  Set aside.
  2. Melt each color of candy wafer in microwave safe bowl in 10-20 second intervals until candy is melted.  Add to quart sized freezer bag.  Snip an end and coat skull mold with candy (ensure thick enough to coat all sides of mold but leave a space to allow for filling).  Tap mold to remove air bubbles and to make sure all parts of mold are coated well.  Reheat candy as needed.  Freeze mold for 5 minutes.
  3. Remove mold from freezer and fill cavities with small ball of the cake mixture.  Press to cake fills mold cavity (see photos).  Cover with more melted candy.  Tap to cover evenly.  Freeze for 10-15 minutes.  
  4. Pop cake bite out of mold.  
  5. Spray with color mist.  Let dry 10 minutes.
  6. Repeat with other colors.
Prep time: 1 and 1/2 hoursYield: 25-30 cake bites 

Tuesday, October 18, 2016

Harry Potter Patronus Cupcakes


Do you ever have one of those ideas that hits you when you are about to fall asleep and then forget to write it down and then wake up in the morning going "Dang, I know I had an awesome idea but what was it??" You know because your mind forgets?? Well I do that All.The.Time but this time I managed to wake up a little to write it down - and hence you get Harry Potter patronus cupcakes!


You guys probably know I am a huge HP fan.  Every time one of the channels plays the movies all weekend I pretty much have to leave it on as a loop playing in the background.  

I love that all the wizards and witches have a patronus.  A patronus is protection or guardian charm that takes the form of an animal that the caster has deep affinity.  You can also find your own patronus on the Pottermore site.  I love that mine is a dolphin!


The patronus cupcake toppers start with vanilla candy melts/wafers.  


Once vanilla candy is dry, outline with black candy melts/wafers.  


       Since a patronus is very ethereal and seem to glow I sprayed mine with Wilton pearl color mist. 
                                                Color mist is kinda like edible spray paint.


I made the animals for Harry and his friends but you can use your favorite animals too.


I thought homemade blueberry cupcakes would be a neat flavor since blueberry cupcakes seems pretty rare (like a patronus!)


The cupcakes and cream cheese frosting are flavored with freeze dried blueberries.


Also made my own sprinkle mix using a bunch of sprinkles I have in the cupboard.  

I am calling this mix "Expecto Patronum!"


And in case you can't recognize the animals and don't know who has what patronus, you can see them below!


Harry's stag is one of my favs


Although the hands down the winner is Snape and Lily's doe of course! 


AND 

To get ready for the next JK Rollings movie Fantastic Beasts and Where to Find Them (can't wait! please be good, please be good, please be good), the original HP movies are playing in IMAX theaters though October 20th!  Go check Harry and the rest of Dumbledores army out in theaters again!

Harry Potter Patronus Cupcakes
Ingredients
  • 1 box vanilla or white cake mix
  • 1 can of cream cheese frosting
  • 1 cup of freeze dried blueberries (powdered)
  • 1 cup black melts/wafers
  • 2 cups vanilla candy melts/wafers
  • Various blue/pearl sprinkles
  • dark blue/black food gel (optional)
Instructions:
  1. Prepare cupcakes as per box directions adding 1/2 cup of powdered blueberries into batter before baking.
  2. Mix 1/2 cup of blueberry powder into frosting.  Tint with blue/black food gel if desired.
  3. Pipe cooled cupcakes with frosting and top with sprinkles.
  4. Print animals into 1 and 1/2 - 2 inch sizes.  Cover will parchment paper.
  5. Melt each color of candy wafers in quart sized freezer bag in 15 second intervals in microwave until just melted just before using.  
  6. Snip an end of the bag with vanilla candy and trace the animals.  Let harden 10 minutes.  
  7. Spray animals with color mist.  Let dry 10 minutes.
  8. Snip an end of the bag with black candy and outline animals.  Let harden 10 minutes.
  9. Spray entire candy with color mist.  Let dry 10 minutes.
  10. Stand up patronus candies in cupcake as toppers.
Prep time: 1 and 1/2 hoursYield: 12 - 18 cupcakes